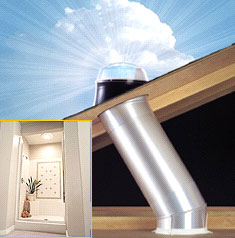
 Tubular skylights use prisms in the domed cap to direct natural light down a reflective tube to produce a diffused glow in the room below even on cloudy days or starlit nights.
What You Will Need
Materials:
- Aluminum Tape
- 2-1/2″ screws
- Skylight Kit
- Roof Sealant
- Pile Seal
Tools:
- Safety Flasses
- Gloves
- Ladder
- Electric Drill
- Keyhole Saw
- Reciprocating Saw
- Hole Saw
- Wallpaper Roller
- Laser Level
- Utility Knife
- Tape Measure
- Disposable Protective Coveralls
- Compass
- Coat Hanger
- Lumber Crayon
How to Install the Tubular Skylight
When choosing your skylight’s location, consider any possible glare. Also, inspect the attic for obstacles, such as wiring, plumbing, floor joists, ventilation ducts, chimneys, and areas where two planes of the roof meet. You can work around the rafters by installing the skylight at an angle.
At your chosen location, drill a one-eighth inch hole through the ceiling, and poke a wire hanger through it to mark the location in the attic.
Take a sheet of plywood to support your weight in an unfinished attic and an extra light to help find the end of the coat hanger. Use your electric drill to screw a two and one-half inch screw through the roof to mark the location of the skylight up there.
DIY Network has detailed, illustrated instructions regarding how to cut the roof hole and how to cut the ceiling hole for a tubular skylight.
On the roof, you will need the flashing and solar dome, crayon, knife, reciprocating saw, caulking gun, sealant, tape measure, and screws. With the flashing centered over the screw in the roof, trace around its inside edge with the crayon. Use the utility knife to cut a circle one-half inch larger than the one you traced into and through the roofing shingles. Remove the tiles, place the flashing upside down on the bare roof, and trace around inside of it. Cut a 14-inch hole around the outside edge of this circle with the reciprocating saw.
After caulking its underside with roof sealant, center the flashing over the hole in the roof with the side of the flashing facing the top of the roof under the shingles and the side facing the bottom of the roof on top of the shingles. Screw the flashing to the roof, and then seal screw heads with roof sealant.
To find the total length of tube that you need, measure from the roof to the attic floor. Tape the seams of the top tube with aluminum tape, and fasten its two parts together with some extra screws. Insert the top tube into the flashing, and align it with the coat hanger.
Make sure that the light deflector faces south before you screw the dome to the flashing. Do not over-tighten the screws, because that could damage the dome, the tube, or both.
Find the exact dimensions of the solar tube in the installation instructions. Use a compass to draw a circle on the room’s ceiling the same circumference as the tube with the coat hanger hole as the center. Cut to the edge of the circle and then along the outside of the line with a jab saw.
Add the two-foot extension tubes as needed. Tape and seal the seams of each section with aluminum tape. Use the brayer roller to be certain the tape adheres evenly. Slide the bottom tube through the ceiling hole, and attach it to the top tube. The tubes nest together. Adjust the tube length, and fasten the tubes together with drywall screws.
Wrap the top of the tube with one-quarter inch pile seal to create an expansion joint to allow the tube to move as it heats and cools and to keep bugs and debris out. Push the tube through the ceiling hole, align all of the sections, and adjust the angle of the bottom elbow so that it fits properly into the top hole. When finished, pull the bottom tube back down, and seal the last seam.
Related Resource: How To Paint Shutters
Use the zip ties to position the diffuser so that it is flush with the ceiling. Pull the ties through the diffuser with the ends tucked into the attic. Reinsert the tube into the attic. Fasten the ties tightly and secure them with four screws, but do not over-tighten to avoid damaging the ceiling or deforming the tube. Trim the ties close to the screws. Pull the protective film from the skylight, sit back, and enjoy the light.